How to Bridge to Hyperliquid (2026): Arbitrum USDC & Cross-Chain Deposits
Table of Contents
- How to Bridge to Hyperliquid
- Route 1: Native Arbitrum USDC Bridge
- Route 2: Cross-Chain Deposits
- How Long Does Bridging to Hyperliquid Take?
- What Is the Minimum Bridge Amount?
- Common Bridge Errors and Fixes
- Checking Bridge Transaction Status
- How to Add Hyperliquid to MetaMask
- Getting Funds onto Hyperliquid
- Native USDC Deposits via Arbitrum
- How to Deposit USDC via the Native Bridge
- Third-Party Bridges
- Across Protocol
- Other Third-Party Bridges
- Mass App: CEX to HyperCore in One Flow
- HyperCore vs HyperEVM
- Bridging from Different Chains
- From Ethereum Mainnet
- From Solana, BSC, and Other L1s
- From L2s and Multi-Asset Deposits
- Fiat On-Ramp
- Direct Fiat Deposits (New)
- A Note on USDH
- How to Bridge to HyperEVM
- Withdrawing from Hyperliquid
- Common Issues and Troubleshooting
- Deposit Not Showing Up
- Bridge Delays
- Other Common Errors
- Next Steps
To bridge to Hyperliquid you move USDC from Arbitrum into Hyperliquid's own Layer 1 using the Deposit button built into app.hyperliquid.xyz. For the standard route there is no separate bridge website to visit: connect an EVM wallet on the Arbitrum One network, click Deposit, type a USDC amount, and confirm. The funds reach your trading balance in about 1 to 2 minutes, and Hyperliquid pays the bridge fee itself, so your only cost is a few cents of Arbitrum gas. If your money already sits on Ethereum, Base, Solana, or another network, a cross-chain bridge such as Across Protocol delivers it to Hyperliquid in seconds with no manual Arbitrum stop. The two routes below cover nearly every deposit: native Arbitrum USDC for anyone already holding funds on Arbitrum, and cross-chain deposits for everyone else. New wallets should apply a referral code for a 4% fee discount before the first deposit.
Last verified: July 2026.
How to Bridge to Hyperliquid
Pick the route that matches where your funds are right now. Both land the same USDC in the same Hyperliquid trading balance.
Route 1: Native Arbitrum USDC Bridge
This is the path most traders use. You need USDC on Arbitrum One, a small amount of ETH on Arbitrum for gas (well under $1), and an EVM wallet such as  MetaMask or
  Rabby.
- Get USDC on Arbitrum. Withdraw USDC from a centralized exchange and select the Arbitrum One network, or swap into USDC on an Arbitrum DEX.
- Connect your wallet. Open app.hyperliquid.xyz, click Connect, and make sure the wallet is set to Arbitrum One.
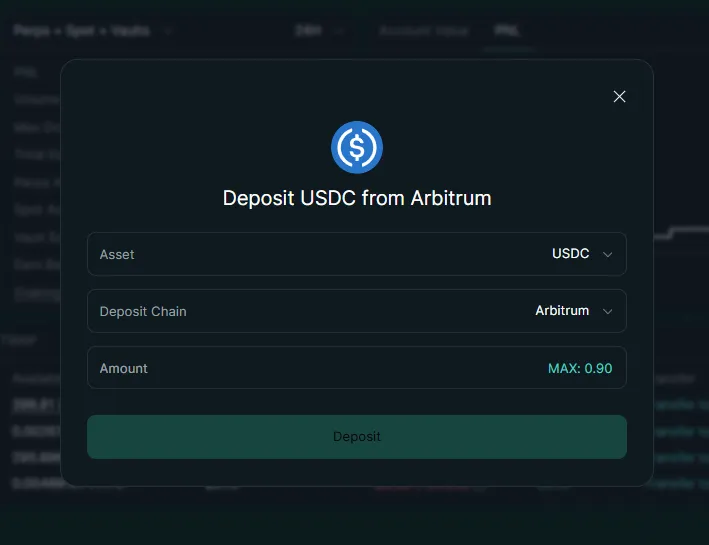
- Open Deposit and enter an amount. Click Deposit, type the USDC amount (5 USDC minimum), and review the gas estimate.
- Approve and confirm. A first deposit asks for a one-time ERC-20 approval, then a deposit transaction. Confirm both in your wallet.
- Wait for the credit. Once Hyperliquid's validators sign the transfer, usually 1 to 2 minutes, your USDC shows up in your portfolio ready to trade.
Get USDC on Arbitrum
Withdraw USDC to your wallet on the Arbitrum One network, or swap into it on an Arbitrum DEX.
Connect your wallet
Open app.hyperliquid.xyz and connect an EVM wallet set to Arbitrum One.
Open Deposit
Click Deposit and enter the USDC amount (5 USDC minimum).
Approve and confirm
Approve USDC once, then confirm the deposit. Gas is a few cents in ETH.
Start trading
Your balance appears in 1 to 2 minutes on HyperCore, ready for perps and spot.
Route 2: Cross-Chain Deposits
If your funds are on Ethereum, Base, Optimism, BNB Chain, Solana, or another chain, skip the manual Arbitrum step and bridge straight in with Across Protocol.
- Open Across. Go to app.across.to and connect the wallet holding your funds.
- Pick your origin chain and token. Select the network you are coming from and USDC (USDT is also supported on some routes).
- Choose HyperCore as the destination. This routes the deposit to Hyperliquid's trading layer. Select HyperEVM instead if the funds are for DeFi.
- Confirm the transfer. Review the relay fee (usually under $1 on sub-$1,000 transfers) and confirm in your wallet.
- Receive on Hyperliquid. L2-to-Hyperliquid routes settle in as little as 2 seconds, and Ethereum routes in about 10 seconds.
Open Across
Go to app.across.to and connect your wallet.
Select origin and USDC
Choose the chain your funds are on and pick USDC as the token.
Destination: HyperCore
Route to HyperCore for trading, or HyperEVM for DeFi.
Confirm the relay
Approve the transfer and its small relay fee in your wallet.
Funds arrive in seconds
L2 routes settle in ~2 seconds, Ethereum in ~10 seconds.
How Long Does Bridging to Hyperliquid Take?
Native Arbitrum deposits typically confirm within 1–2 minutes. Third-party bridges like Across Protocol can deliver funds in as little as 2 seconds for L2-to-Hyperliquid routes and around 10 seconds from Ethereum mainnet. During periods of high network congestion, native deposits may take up to 5–10 minutes. If your deposit has not arrived after 10 minutes, check the transaction status on arbiscan.io.
What Is the Minimum Bridge Amount?
The minimum deposit via the native Arbitrum bridge is 5 USDC. Third-party bridges like Across Protocol may have their own minimums (typically very low or none). There is no maximum deposit limit. For practical trading, most traders start with at least $50–$100 to have meaningful margin for leveraged trading.
Common Bridge Errors and Fixes
| Error | Cause | Fix |
|---|---|---|
| Transaction stuck pending | Insufficient ETH for gas on Arbitrum | Add $1–2 of ETH to your Arbitrum wallet for gas, then retry |
| "Insufficient funds" | Trying to bridge more USDC than available | Verify your USDC balance on Arbitrum (not mainnet or another chain) |
| Funds not appearing after 10 min | Network congestion or RPC issue | Check tx on arbiscan.io, then refresh app or clear cache for app.hyperliquid.xyz |
| Wrong network error | Wallet connected to Ethereum mainnet | Switch wallet to Arbitrum One network, then reconnect to Hyperliquid |
| MetaMask RPC timeout | Node congestion or stale RPC | In MetaMask Settings > Networks > Arbitrum One, switch RPC to https://arb1.arbitrum.io/rpc |
If your deposit sits in a pending state for more than ten minutes, the issue is almost always related to gas, RPC, or a bridge-side liquidity dip rather than something Hyperliquid can fix from its side. For a fuller walk-through of stuck deposits, slow Across relays, and native-bridge timing edge cases, see our dedicated bridge delays troubleshooting page.
Checking Bridge Transaction Status
To verify a pending deposit: copy your transaction hash from your wallet, paste it into arbiscan.io, and confirm it shows "Success." If the Arbitrum transaction succeeded but funds are not on Hyperliquid, open your Portfolio on app.hyperliquid.xyz, where deposits usually appear within 1 to 2 blocks. If still missing after 10 minutes, try a hard refresh (Ctrl+Shift+R) or switch browsers.
How to Add Hyperliquid to MetaMask
A common point of confusion: there is no network called "Hyperliquid" to paste into MetaMask. The native bridge lives on Arbitrum One, so the network you add for depositing is Arbitrum, not a Hyperliquid RPC. Your deposit goes to the Arbitrum bridge contract, and the trading itself runs on Hyperliquid's own L1 (HyperCore), which MetaMask never connects to directly. You sign one approval in MetaMask and the app relays the rest.
To add Arbitrum One so MetaMask can bridge into Hyperliquid:
- Open MetaMask and click the network dropdown at the top left.
- Choose Add a network, then Add a network manually.
- Fill in the Arbitrum One details:
- Network Name: Arbitrum One
- RPC URL:
https://arb1.arbitrum.io/rpc - Chain ID:
42161 - Currency Symbol: ETH
- Block Explorer URL:
https://arbiscan.io
- Click Save, then switch MetaMask to Arbitrum One before you connect to Hyperliquid.
The one-click way is chainlist.org: search "Arbitrum One" and click Add to MetaMask, which fills every field for you.
Info
For the full wallet walkthrough, including install and first connection, see our connect MetaMask to Hyperliquid guide.
Getting Funds onto Hyperliquid
Hyperliquid runs on its own Layer 1 blockchain, which means your funds need to be bridged from another network before you can trade. There are several ways to get USDC onto Hyperliquid, ranging from the native Arbitrum bridge built directly into the app to third-party cross-chain bridges that let you move funds from virtually any blockchain.
Info
Quick Summary - Bridging Funds to Hyperliquid
- The native Arbitrum bridge deposits USDC directly to Hyperliquid in 1-2 minutes for ~$0.10-0.50 gas
- Across Protocol supports 22+ source chains with 2-10 second transfers ($0-1 relay fee)
- Direct crypto deposits (BTC, ETH, SOL) are supported - Hyperliquid auto-converts to USDC
- CEX withdrawals: send USDC to your Arbitrum wallet first, then deposit to Hyperliquid
- Hyperliquid charges zero fees on all deposits - you only pay source chain gas
- As of March 2026, withdrawals cost a flat 1 USDC and arrive in seconds
- Sign up with a referral code before your first deposit for a 4% lifetime fee discount
Here is a quick overview of your options:
| Method | Source | Speed | Cost | Best For |
|---|---|---|---|---|
| Native Hyperliquid bridge | Arbitrum | 1-2 minutes | A few cents in ETH gas | Most users with USDC on Arbitrum |
| Across Protocol | 22+ chains | 2-10 seconds | Free to under $1 | Cross-chain deposits, speed |
| Other third-party bridges | Multiple chains | 1-5 minutes | 0.01-0.2% | Specific chain support |
| CEX withdrawal to Arbitrum | Centralized exchange | 2-10 minutes | Varies by exchange | Users starting from fiat or CEX balances |
| Direct multi-asset deposit | BTC, ETH, SOL, etc. | Varies | Varies | Non-USDC holders |
 Mass App Mass App | Any major CEX | Minutes | Varies by exchange | Mobile users who want one flow from CEX to HyperCore |
For a focused walkthrough of the native deposit process itself, see our deposit USDC guide. This article covers all bridging methods end to end. If you plan to trade both spot and perps, consider enabling a unified account after depositing - it lets you share collateral across markets.
New to Hyperliquid? Get a Lifetime Fee Discount
Apply our referral code when you first connect your wallet. It gives you a 4% discount on all trading fees that cannot be added later.
Open Hyperliquid with 4% DiscountNative USDC Deposits via Arbitrum
The primary way to deposit funds into Hyperliquid is through its built-in bridge from Arbitrum. This is the method used by the majority of traders. Hyperliquid fully subsidizes the bridging fee, so you only pay the small Arbitrum gas cost (typically a few cents in ETH). To get started, you need USDC in your wallet on the Arbitrum One network, a small amount of ETH on Arbitrum for gas (less than $0.50 is sufficient), and an EVM-compatible wallet that supports Arbitrum, such as MetaMask or Rabby. Phantom does not support Arbitrum, so Phantom users need one of the other funding routes.
How to Deposit USDC via the Native Bridge
Step 1: Get USDC on Arbitrum. If you do not already have USDC on Arbitrum, the easiest method is to withdraw from a centralized exchange. Go to your exchange's withdrawal page, select USDC, choose Arbitrum One as the network, and paste your wallet address. Most major exchanges support Arbitrum withdrawals with low or zero fees.
Step 2: Connect your wallet to Hyperliquid. Navigate to app.hyperliquid.xyz and connect your wallet. Make sure your wallet is set to the Arbitrum One network. If this is your first time, see our wallet setup guides for MetaMask, Rabby, or Phantom.
Step 3: Click Deposit. Find the Deposit button in the portfolio section or top navigation bar. Enter the amount of USDC you want to bridge into Hyperliquid. You will see your available Arbitrum USDC balance and the estimated gas fee.
Step 4: Approve and confirm. If this is your first deposit, your wallet will ask you to approve USDC spending for the bridge contract - this is a standard ERC-20 token approval and a one-time step. Then confirm the deposit transaction itself. The gas fee will be a few cents in ETH.
Step 5: Wait for confirmation. Your deposit will be credited once more than two-thirds of Hyperliquid's validator staking power has signed the transaction. This typically takes 1-2 minutes. Your USDC balance will appear in the Hyperliquid portfolio section automatically.
Info
| Detail | Value |
|---|---|
| Source network | Arbitrum One |
| Accepted token | USDC |
| Deposit fee | Free (Hyperliquid subsidized) |
| Gas cost | A few cents in ETH on Arbitrum |
| Confirmation time | 1-2 minutes |
| Minimum deposit | 5 USDC |
| First-time extra step | ERC-20 token approval |
Third-Party Bridges
If your funds are not on Arbitrum, third-party bridges let you send USDC (and sometimes other tokens) directly to Hyperliquid from other chains - often faster than routing through Arbitrum manually.
Across Protocol
Across Protocol is the most widely used third-party bridge for Hyperliquid. It supports direct bridging from 22+ chains into HyperCore and HyperEVM, with transfers completing in as little as 2 seconds.
How to use Across:
- Go to app.across.to
- Connect your wallet
- Select your origin chain (Ethereum, Base, Optimism, BNB Chain, Polygon, etc.) and USDC as the token
- Choose HyperCore as the destination chain and USDC as the destination token (you can also select USDT)
- Enter the amount you want to bridge
- Review the fee breakdown - most transfers under $1,000 cost less than $1 in fees
- Confirm the transaction in your wallet
- Receive funds on Hyperliquid within seconds
Tip
Other Third-Party Bridges
Beyond Across, several other bridges support Hyperliquid deposits. deBridge enables cross-chain transfers from Ethereum, Solana, BNB Chain, and other networks, converting your assets to Arbitrum-native USDC and depositing them into your Hyperliquid account with typical transfer times of 1-5 minutes. Symbiosis offers one-click bridging and exchange into Hyperliquid, supporting a wide range of source chains and tokens while automatically routing through the best path to deliver USDC. HyBridge (hybridge.xyz) is purpose-built for the Hyperliquid ecosystem, allowing you to bridge any token into Hyperliquid for trading HYPE, ETH, SOL, and other assets with fast cross-chain swaps. Additional options include Mayan Finance, Router Nitro, Jumper Exchange, Synapse Protocol, and Relay - each with different chain support, fee structures, and transfer speeds. For large transfers (over $10,000), compare fees across multiple bridges before committing.
Warning
Mass App: CEX to HyperCore in One Flow
Mass is a non-custodial mobile app built on Hyperliquid, and in July 2026 it added onboarding routes from any major centralized exchange straight through to HyperCore. Instead of the usual sequence of withdrawing to Arbitrum, checking the address, waiting for confirmations, and then running the deposit yourself, you pick your exchange in the app and it handles the routing.
That collapses the step where most people lose funds. Withdrawing from a CEX to the wrong network is the single most common way a first deposit goes missing, and it accounts for a large share of the cases in our deposit not showing up guide.
Mass itself is a mobile trading app covering perps, spot, tokenized equities, and prediction markets, so the onboarding flow lands you in a trading interface rather than back at a bridge page. If you would rather trade in Hyperliquid's own app afterward, the funds are on HyperCore either way and available at app.hyperliquid.xyz with the same wallet. See our mobile trading guide for how the third-party mobile options compare.

Source: mass.money - used under fair use for educational purposes
Tip
HyperCore vs HyperEVM
When you bridge funds to Hyperliquid, it is important to understand that deposits go to HyperCore by default. HyperCore and HyperEVM are two distinct layers within the Hyperliquid ecosystem, and they serve different purposes. HyperCore is the trading layer - this is where perpetual futures, spot trading, and order book operations happen. When you deposit USDC through the native bridge or most third-party bridges, your funds land on HyperCore and are ready for trading immediately. HyperEVM is the smart contract layer, where DeFi protocols, lending platforms, liquidity pools, and other decentralized applications live. If you want to use DeFi on Hyperliquid, you need funds on HyperEVM.
Moving funds between these two layers is a separate step from bridging. Go to your Portfolio page on app.hyperliquid.xyz, find the Transfer to/from EVM option, select the direction (HyperCore to HyperEVM or vice versa), enter the amount of USDC to transfer, and confirm the transaction. The transfer costs a small amount of gas (approximately 200k gas at the base gas price) and is processed on-chain within seconds.
For a deep dive into HyperEVM and the DeFi protocols available, see our Hyperliquid DeFi ecosystem guide.
Bridging from Different Chains
Your starting point determines the optimal bridging route. Here is how to get funds to Hyperliquid from the most common chains.
From Ethereum Mainnet
You have three options depending on your priority. Across Protocol (fastest): Bridge USDC from Ethereum directly to HyperCore using Across at app.across.to - transfers take approximately 10 seconds and cost under $1 in fees. Official Arbitrum Bridge (safest): Go to bridge.arbitrum.io, bridge USDC from Ethereum to Arbitrum (takes 10-15 minutes), then deposit from Arbitrum into Hyperliquid using the native bridge. This two-step approach uses only official infrastructure. CEX route (cheapest): If your ETH or USDC is on a centralized exchange, withdraw USDC directly to Arbitrum, then deposit into Hyperliquid.
From Solana, BSC, and Other L1s
For Solana, use Across Protocol, deBridge, or Mayan Finance to bridge USDC (or SOL) to Hyperliquid with transfer times of 2-10 minutes. Hyperliquid also supports direct SOL deposits through the deposit interface - check the latest options at app.hyperliquid.xyz. For BNB Smart Chain, use Across Protocol or Stargate to bridge USDC to Arbitrum or directly to Hyperliquid, with typical transfer times of 2-5 minutes and fees of 0.01-0.1%. For Polygon or Avalanche, use Across Protocol or Stargate to bridge USDC to Arbitrum, then deposit into Hyperliquid - or use Across for direct Hyperliquid bridging from supported networks.
From L2s and Multi-Asset Deposits
Base, Optimism, and other L2s offer the fastest routes since L2-to-Hyperliquid transfers via Across complete in as little as 2 seconds. Use app.across.to, select your L2 as the origin, and bridge USDC directly to HyperCore.
Hyperliquid also supports direct deposits of non-USDC assets on certain networks:
- BTC from Bitcoin
- ETH and ENA from Ethereum
- SOL, BONK, FARTCOIN, PUMP, SPX, and 2Z from Solana
- MON from Monad
- XPL from Plasma
These assets are deposited directly through the Hyperliquid interface. Check app.hyperliquid.xyz for the current list of supported deposit tokens and networks.
Funds Ready? Start Trading with Lower Fees
Hyperliquid charges zero gas fees on every trade. Pair that with a 4% fee discount using our referral code for the lowest costs possible.
Start Trading - Save 4%Fiat On-Ramp
If you are starting from fiat currency (USD, EUR, etc.) and want to get funds onto Hyperliquid without buying crypto first, there are now two native paths.
Direct Fiat Deposits (New)
Hyperliquid has launched native fiat onramping powered by swapped.com. You can deposit directly using a credit card or bank transfer, with no crypto, no bridging, and no CEX account required. Just select "Fiat" in the deposit modal on app.hyperliquid.xyz and follow the checkout flow. This is the simplest path for users who are completely new to crypto. For the full walkthrough, see our fiat onramp guide.
Info
A Note on USDH
USDH was Hyperliquid's original native stablecoin, issued by Native Markets. It has since sunset under AQAv2, and all USDH-denominated markets on HyperCore have settled, leaving USDC as the aligned quote asset. Deposit and trade with USDC. If you still hold USDH, you can swap it to USDC at no cost via Across Protocol (1:1) or on the HyperCore spot order book. For background, see our USDH stablecoin guide.
How to Bridge to HyperEVM
Everything above covers depositing to HyperCore - the trading layer where perpetual futures, spot markets, and the order book operate. But Hyperliquid also has HyperEVM, an Ethereum-compatible smart contract layer that powers a growing DeFi ecosystem. Protocols like  Felix,
  HyperLend, and
  Kinetiq all run on HyperEVM, offering lending, liquid staking, yield vaults, and more. If you want to do anything beyond trading on Hyperliquid, you need funds on HyperEVM.
Bridging to HyperEVM is a separate step from depositing to Hyperliquid. The most common path is to first deposit USDC to HyperCore using any of the methods described above, then transfer from HyperCore to HyperEVM using the Transfer to/from EVM option on your Portfolio page. This internal transfer completes in seconds and costs fractions of a cent - both layers run on the same Hyperliquid L1, so there is no cross-chain bridging delay. You will also need a small amount of HYPE on HyperEVM to pay gas fees (0.5–1 HYPE is more than enough). Alternatively, you can skip HyperCore entirely and bridge directly to HyperEVM from Ethereum, Base, Arbitrum, or 20+ other chains using Across Protocol - just select HyperEVM instead of HyperCore as the destination at app.across.to.
For the full step-by-step walkthrough - including wallet setup, network configuration, and troubleshooting - see our complete HyperEVM bridging guide.
Withdrawing from Hyperliquid
Moving funds back out of Hyperliquid is straightforward, and our withdraw USDC from Hyperliquid guide covers it in full. Withdrawals go to your wallet on Arbitrum One. To withdraw, go to your Portfolio page on app.hyperliquid.xyz, click the Withdraw button, enter the amount of USDC you want to withdraw, and confirm the transaction. Your funds will be deducted from your Hyperliquid balance immediately. Validators then sign and finalize the transfer to Arbitrum, which typically takes seconds to a few minutes.
| Detail | Value |
|---|---|
| Destination network | Arbitrum One |
| Withdrawal fee | 1 USDC (flat fee to cover validator gas) |
| ETH required | None - the fee is paid in USDC on Hyperliquid |
| Processing time | Seconds to a few minutes |
| Minimum withdrawal | No official minimum (must cover 1 USDC fee) |
Once your USDC is back on Arbitrum, you can deposit to a centralized exchange by sending USDC to your exchange wallet address on Arbitrum, bridge to another chain using Across Protocol, Stargate, or other bridges to move USDC to Ethereum, Solana, BSC, etc., swap on Arbitrum by trading USDC for ETH or other tokens using Uniswap or another Arbitrum DEX, or simply hold on Arbitrum in your wallet for future Hyperliquid deposits.
Common Issues and Troubleshooting
Deposit Not Showing Up
If your deposit has not appeared after 5 minutes:
- Check the transaction on Arbiscan. Open arbiscan.io, search your wallet address, and verify the transaction shows "Success."
- Refresh the Hyperliquid page. The balance display sometimes requires a manual refresh to update.
- Verify you are checking the right balance. Deposits go to your Hyperliquid Account Balance (on HyperCore), not your wallet balance on Arbitrum.
- Wait during congestion. High network activity can extend deposit times to 5-10 minutes.
- Disconnect and reconnect your wallet as a last resort.
If the issue persists, see our deposit not showing troubleshooting guide.
Bridge Delays
Third-party bridges occasionally experience delays due to liquidity constraints, network congestion, or bridge-specific processing times.
- Across Protocol: Typically completes in 2-10 seconds. If delayed beyond 1 minute, check the Across transaction tracker on their app.
- deBridge / Symbiosis / Others: Check the bridge provider's transaction status page using the transaction hash from your wallet.
- Native Hyperliquid bridge: If stuck for more than 10 minutes, the transaction may need to be sped up in your wallet (increase gas).
For detailed troubleshooting, see our bridge delays guide.
Other Common Errors
Wrong network selected: If your wallet shows a network error when trying to deposit, open your wallet settings and switch to Arbitrum One. If Arbitrum is not listed, add it manually (Chain ID: 42161, RPC: https://arb1.arbitrum.io/rpc) and retry the deposit. Always double-check the destination network when withdrawing from a centralized exchange - selecting Ethereum mainnet instead of Arbitrum One means you will need to bridge from Ethereum to Arbitrum before depositing into Hyperliquid, an extra step that costs more in gas.
"Insufficient Funds" error: This means either you do not have enough USDC on Arbitrum (check your wallet is on the correct network) or you do not have enough ETH on Arbitrum for gas (you need about $0.30-$0.50 worth). If you have tokens on Arbitrum but not USDC, swap them on app.uniswap.org (set to Arbitrum network) before depositing.
First-time token approval: Your first deposit requires an ERC-20 token approval - a separate transaction that authorizes the Hyperliquid bridge contract to spend your USDC. This is standard practice and a one-time step. You will see two transactions in your wallet: the approval first, then the deposit.
Next Steps
With your funds on Hyperliquid, you are ready to start trading:
- Beginner checklist - Full start-to-trade checklist to make sure you haven't missed anything
- How to trade on Hyperliquid - Complete beginner's guide covering order types, leverage, and risk management
- Deposit USDC guide - Detailed walkthrough focused specifically on the deposit process
- Fees explained - Maker/taker rates, VIP tiers, and how the 4% referral discount stacks up
- HyperEVM explained - Understand the smart contract layer and how to access DeFi on Hyperliquid
- USDH stablecoin guide - Learn about Hyperliquid's native stablecoin and fiat on-ramps
- Hyperliquid DeFi ecosystem - Explore lending, liquidity pools, and other DeFi protocols on HyperEVM
- Deposit not showing? - Fix missing deposits after bridging
- Bridge taking too long? - Troubleshoot slow or stuck bridge transactions
Ready to Trade? Don't Forget Your Fee Discount
Make sure you applied our referral code before your first trade. It gives you a permanent 4% trading fee discount that cannot be added later.
Open Hyperliquid with 4% DiscountFrequently Asked Questions
The simplest method is to deposit USDC directly from Arbitrum using Hyperliquid's built-in bridge at app.hyperliquid.xyz. Connect your wallet, click Deposit, enter your USDC amount, and confirm the transaction. Hyperliquid charges zero deposit fees - you only pay a few cents in Arbitrum gas. Alternatively, use Across Protocol to bridge USDC from 22+ chains directly into Hyperliquid without needing to stop on Arbitrum first.
There is no network called Hyperliquid to add. The native bridge runs on Arbitrum, so you add Arbitrum One to MetaMask instead: Network Name Arbitrum One, RPC URL https://arb1.arbitrum.io/rpc, Chain ID 42161, Currency Symbol ETH, Block Explorer https://arbiscan.io. Then switch MetaMask to Arbitrum One and connect at app.hyperliquid.xyz. Your deposit goes to the Arbitrum bridge contract and the trading happens on Hyperliquid's own L1, which the app handles after you sign. HyperEVM, the DeFi layer, is a separate optional network.
Hyperliquid's native bridge only accepts deposits from Arbitrum. However, third-party bridges like Across Protocol, deBridge, and Symbiosis support direct bridging from Ethereum, Base, Optimism, BNB Chain, Solana, Polygon, Avalanche, and 15+ other chains. You can also deposit BTC from Bitcoin, ETH or ENA from Ethereum, SOL and select SPL tokens from Solana, MON from Monad, and XPL from Plasma directly through the Hyperliquid interface.
Native deposits from Arbitrum typically confirm within 1-2 minutes. Third-party bridges like Across Protocol can deliver funds in as little as 2 seconds for L2-to-Hyperliquid routes and around 10 seconds from Ethereum. During periods of high network congestion, native deposits may take up to 5-10 minutes. If your deposit has not arrived after 10 minutes, check the transaction on arbiscan.io.
Go to your Portfolio page on app.hyperliquid.xyz, click Withdraw, enter the USDC amount, and confirm. Hyperliquid charges a flat 1 USDC withdrawal fee to cover validator gas costs - you do not need ETH on Arbitrum. Withdrawals typically arrive in your Arbitrum wallet within seconds to a few minutes. From Arbitrum, you can bridge to any other chain or deposit back into a centralized exchange.
Hyperliquid L1 is the trading layer where you deposit USDC to trade perps and spot. HyperEVM is Hyperliquid's EVM-compatible chain for DeFi apps like lending, staking, and liquidity protocols. If you want to trade on Hyperliquid, bridge to L1 via app.hyperliquid.xyz. If you want to use DeFi protocols like Felix or HyperLend, you need to transfer funds from L1 to HyperEVM within the app.
If your native Arbitrum deposit has not arrived after 10 minutes, check the transaction status on arbiscan.io. Common causes include insufficient ETH for gas on Arbitrum, network congestion, or using the wrong network. For third-party bridges like Across Protocol, check the bridge's transaction tracker. If the transaction shows confirmed on Arbitrum but funds are not on Hyperliquid, try refreshing the app or clearing your browser cache.
Independent resource: Hyperliquid Guide is an independent, third-party resource operated by Concept211. It is not affiliated with, produced by, reviewed by or endorsed by Hyper Foundation, Hyperliquid Labs or any other Hyperliquid-ecosystem entity. "Hyperliquid" and related names and marks belong to their respective owners and are used here only to identify the platform this site documents. Read the full disclaimer.
Not advice: Nothing on this site is legal, tax, financial or investment advice. Descriptions of regulatory status, tax treatment and market availability are general information that varies by jurisdiction and changes over time. Confirm anything that matters to you with a qualified professional and against primary sources. Trading perpetual futures involves substantial risk of loss, and past performance does not indicate future results.
Disclosure: this site contains referral links. Signing up through the 4% lifetime fee discount link earns us a share of the trading fee Hyperliquid already charges, at no extra cost to you.
Ready to Start Trading?
Join Hyperliquid with our referral link and get a 4% lifetime fee discount. No KYC, no email - just connect your wallet and trade.
Start Trading - Save 4%